Some of you know that John and I have settled on naming the baby girl Abilene and I had just assumed we were going to call her Abby for short. Well as I was slouching on the couch the other evening John says to me "what about calling her Lena for short?" I had several thoughts run through my head within seconds. "no, were calling her Abby" " where did you get Lena from oh abiLENE" "huh, I never thought of that...what do I think of that" "well it's sooo different from Abby" "I kind of like it". All that came out of my mouth was "I don't know". Some things come with the baby and nicknames are definitely one of them. But I haven't been able to stop thinking about it. Maybe it's my tendency to plan things in advance or maybe it's just because my brain is on baby stuff. Either way I'd like to know what you think. So share your thoughts...Abby or Lena???
I did put together some things last week for said girl. I made two coordinating sheets for her crib. I use Dana"s pattern from MADE, which you can find here. I love making crib sheets and only wish i had know how simple it was sooner. Buying boring or baby looking sheets is just no fun and so for the same price (or way cheaper if you've got a coupon) you can make you own out of cotton, flannel or knit.
Both of these are cotton and I found the fabric at Joann's. They came together real simply. Just a little udder 2 yds of fabric and 80 inch of 1/4 inch elastic.
I also whipped out (..up...out..??) this gauze blanket, mentioned here. I had gotten some really cute gauze fabric from fabric.com in order to make some gauze swaddle blankets. Here is one of the fabrics I got.
I also love how easy and cost effective this was. It only takes a yard and 1/4, or a 45 inch square to be exact. So at $3.99 a yd it only cost about $5 bucks.
To finish off the edges I just did a double fold hem and straight stitched it. When I got to the corners I just folded one down onto the other so I didn't have to worry about being too fancy.
After I washed it up and was so soft and wrinkly I just love it!!! Can't wait to swaddle the little cutie in this cute blanket... 13 (to 15) weeks left and counting down.
Until next time...
Holly
Showing posts with label sewing. Show all posts
Thursday, May 3, 2012
Tuesday, April 10, 2012
Fat Tuesday's T-Shirt Quilt
I used to like the idea of a t-shirt quilt. I've been saving these t-shirts since I was little....I have shirts in here that I've had since I was nine ( I won't say how long that is, but it's over twenty years by a decent bit...). They've moved around with me from place to place; quite honestly by the time I got around to it I was kind of over it.
I cut them into pieces about two years ago, right when I started to sew and got all excited about quilting. Then other projects got in the way and my little rectangles fell by the wayside. I almost didn't continue on it but it seemed a waste to go thru dragging those t-shirts around for all this time and then do nothing with them. So sew them together I did, and look how fun it turned out! The top of course, it's not done. I need to sew on the ironed on patches and then quilt and bind it- I'm procrastinating, I'll admit it. Actually I'm hoping that posting the top here will inspire me to finish it by next week to show y'all. It's certainly not a work of art, but it's memories and it's mine and I'm so glad I went ahead with it. Here's to being back next week to show it off!
Tuesday, April 3, 2012
Fat Tuesday's Easter 2012!
Annnd, done! Yay! No last minute Easter eve sewing for me...no hurried stressing... Well, that last part is not true. I received one of those lovely Shutterfly coupons last week for ten free cards and I wanted to do Easter ones but those coupons only last for two days. Quite honestly there was quite a bit of hurried stressing. Trying to get the skirts done, shirts bought, pictures taken, and cards designed in the one day I had left by the time I noticed the coupon in my inbox- But didn't they turn out cute and summery?
![]() |
| (darling popsicle fabric from JoAnn Fabrics- Lisette by Liesl and Co) |
My middle child despises dressing up so I went for a little bit more toned down and casual summer in hopes that she might wear it more than once without being forced.
The patten is the Layered Skirt Tutorial by MADE- go check out her darling seersucker version on her cutie pie Lucy- ADORABLE. Super easy and fun. I will say that while you can totally do this without a serger, the serger made it so much faster/easier/bouncier. Let's hear it for sergers!
Can I just say I adore this photo and my sweet youngest trying to cram a pink plastic egg in her mouth? Good thing they have little holes in each end- she has a VERY large mouth. Look at that forehead wrinkled in concentration while she tries to get it in...
Happy Easter my readers. May it be full of remembrance, and joy, and God's love, and bouncy skirts on bouncy babies.
Thursday, March 29, 2012
Anthems and Nonsense
Do you ever hear a song that sounds sort of like an anthem and even though the lyrics may be terrible it's catchy enough that the chorus kicks in and you shout it at the top of your lungs?? Well I do. There is something therapeutic about it. Almost like, no matter what it is I'm saying right now, it expresses a certain emotion, usually not at all related to the lyrics (at least for me). This week the song is We Are Young by Fun and of course they are playing it like every 5 minutes on the radio. Don't judge. If you are having trouble trying to conjure up a song you may have felt this way about a popular one is Here I Go Again on My Own by Whitesnake... although this whole tangent might apply more to those who secretly have always wanted to be a singer in a band and don't have the vocal abilities (me).
So that is not at all related to sewing but it was on my mind so I decided to share. In my sewing world this week I had some frustrations with my machine. I got all geared up to try and make this bag, The Weekender, that I pinned on Pinterest a while ago.
I got out my materials which included this brown and white decorator fabric, costume pleather, and some scraps for a possible liner which is not included in the original tutorial.
I started cutting and even though I read through the directions at least 4 times, of course I cut it wrong. 5 inches to short and not enough fabric left over to do it again :(

So I decided I would just modify it a bit. I usually count on my first try at any one pattern as being a prototype so this doesn't bother me too much. Then as I continued to read through the instructions I just felt really confused and there were no pictures to really show certain things and I like to see it not just read it, it's how I teach myself new techniques. So I just decided I would do it the best way I thought and take lots of pictures and make my own tutorial inspired by the bag.
Fast forward to me starting to sew and I can't get my tension right. ARGH! I fiddle with it for awhile, but I was also sewing at Miranda's and didn't have all of my stuff with me. So I decided the best thing for my sanity was to pack it in and finish it at home.
So tune in next week for my first ever (inspired) tutorial...
Holly
Thursday, March 22, 2012
Lets Hear it for the Girl!!
So last week I found out I was having a girl and I am oh so very excited!!! Besides all of the clothes I want to sew and freezer stencil for her I am also looking forward to sewing everything for her nursery/blanket needs. If you recall last October, Miranda and sold some of our handmade items at Oktoberfest. One of the things I had made on a whim one day was this precious baby "quilt". I put quotations around that because technically a quilt is fabric sandwiching padding and sewn together. Well I sewed my pieced top straight onto fleece with no padding. I wanted to give it a more comfy baby feeling. When I was done I had fallen in love with it and at the time (not pregnant) wanted to keep it for myself on the off chance I ever had another baby and it would be a girl. But that seemed silly. Well no one has purchased said quilt and now pregnant with a girl, it is all mine!!!
The lighting doesn't do the colors justice, but it is shades of green, turquoise and taupe with hints of yellow.
The design is a basic subway pattern but I added fours scattered square blocks throughout of bigger patterns to help break up the straight lines. Some of the fabric came from fat quarters from Joann's, but a few of the other scraps came from a scrap bag I purchased last summer at the Sisters out door quilt show and just to name drop the scrap bag was from Valori Wells' studio (so I was told). I also have some scraps that came from a shirt my mom made last summer and a blanket I made for a friend last year with fabric purchased from the Stitchin Post in Bend, OR. So there are many cool memories linked to this quilt and I think I was just meant to keep it.
Something else I did differently on this quilt, besides the fleece backing, was to use ribbon binding. I typically make my own binding and hand sew it on, but I wanted to try something new and knowing it was a baby blanket I have always like the texture and look of ribbon edging.
Lastly, this is a photo of some flannel from Joann's I randomly picked up several months ago. Flannel was on sale, I saw this, loved it and bought 2 yards...ha ha. Not only is it really cute and has birds... but the greens and blues and taupe match perfectly with the above blanket. I think my nursery is decorating itself. Now what to make with this.. a crib sheet? a self binding flannel blanket? Something else entirely?
What do you think??
See you next week!
Holly
Tuesday, March 20, 2012
Fat Tuesday sewed a pattern
(and she kicked and screamed and only did it one more time ever)...
Easter is coming y'all! Remembrance of the greatest gift ever given, the annual Smith egg hunt.....and new dresses! Well here is my first attempt, (two years ago), at an Easter dress to get you in the mood to sew something for the little one's in your life...
This was my second sewing project ever. It's a "See & Sew" pattern #B5198. It was a bear to sew. I'm not sure if it was the pattern or just that I was so new to sewing in general but it seemed excessively hard at the time.
(PS- check out that wrist chub- she slays me. I'm so in love)
It's supposed to have a zipper but I fell for these buttons so I adjusted it a bit for elastic loops and buttons instead...
In retrospect I should have used a solid fabric, it turned out way too busy for my taste even with the seemingly simple pattern. I like the bright springiness of it, but it seems a bit overwhelming.
So there you have it- dress, bag, and headband (way too scrunchy- live and learn) all made by Mama for my first girl on her second easter. (And for the record the things she's double fisting are grapes and strawberries- a treat but not one to make a kid go crazy in church, just one to make Mama stress about the dress and strawberry juice...).
I'll be back next week with last years dresses for both my girls (and a pair of pants for the boy!), and the week after that with this years skirts. Happy dress making folks-
Monday, March 19, 2012
sewing...sparsely
So...in my sewing room (read: garage workshop that I share with my husbands tools and new drumset...story on that later), I've been piecing together the last of these blocks!
right sides together
the big block, comprised of four blocks
big block is 17" square
each small block began as a 9" block
diagonal scrappy strips sewn on to a backing piece (scrap)
picking out the fabric for the back.
love it.
and my brother approved it.
and Bennett's hand is trying to touch it in the picture.
Shopping in JoAnn's with two little ones can be challenging...
Today, I'm trying to sew all the rows together, with sashing in between, and then get it all pinned together tomorrow, so I can tie it (g'ma's preferred method of keeping the quilt sandwich together).
A good netflix queue and a quilt to tie/bind can do wonders for the soul.
Thursday, March 15, 2012
Darin' to be Squarish...
Last year I picked up this great book on modern quilts called Dare to be Square by Boo Davis. It is definitely a beginner's book, which was great, and after doing a few traditional quilts I was looking to do something different. Most of her stuff is pretty hard core and innappropriate (which I didn't know until after buying the book and googling her) so if you check out her website, fair warning it's crude. Her book, however, has more of a cute, fun approach to block-by-block quilting. Here are the couple that I made:
For my first two kids I had crocheted them baby blankets. Well... ever since stepping into the world of Quilting I have had very little desire to ever crochet a blanket again. I have picked up the hook for a couple beanies but even then I was itching to get back to my machine. So, I decided baby number 3 would get a quilt. I loved the wiener dog and it was so easy! Definitely had this done in a weekend. I decided to back it with flannel to give it a little extra coziness since quilts can take several washes before they have that wonderful worn-in soft, comfy feeling.
My 5 year old (then 4) had been asking me to make her a quilt and she really liked the Robot on page . So we headed to JoAnn's and I let her help pick out the fabric. Disregarding all my best efforts to sway her color choice she picked a green robot with a pink background and purple accents. She was even particular about the exact fabric and shade of color she chose.

I was actually surprised with how it came together and it wasn't as hideous as I imagined it would be. I added the piano key borders because I did want to make it big enough to fit on a full size bed. My daughter was very happy with it and when I finished she said "wow" and promptly asked when I was going to make her another one. HA! Got to love kids!!
I also made the bunnies from the end of the book, two of which coordinate with the blankets.
The greatest thing I learned from making these quilts was how easy it was to take a concept and make it into a design. It gave me some confidence in my ability to come up with something on my own. Since then I have made several quilts that I just sort of drew out what I wanted it to look like and took and block-by-block approach to piecing them. It's always fun to see how they turn out. I will still follow patterns when I see one I like but I definitely have gained some freedom from my desire to always follow a pattern.
Until next week....
Holly
Tuesday, March 13, 2012
Fat Tuesday's quick projects
Well unfortunately this is another week where I am writing this late monday night with a ton of other things on my plate- so short and sweet it is.
![]() |
| (Freezer paper stenciled shirts for my kids) |
This isn't strictly sewing per-se, but it's crafty and I use it in conjunction with sewing quite a bit. Have you heard of Feezer Paper Stenciling? It's so easy and fun. You just buy freezer paper, cut out the shape you want, iron the paper onto the item you want to paint (with the glossy side of the paper down), paint with fabric paints, and peel off the paper- viola! Don't forget to put a thin cloth over the paint after it's dried and give it a good ironing to seal the paint and keep it from getting so peely in the wash. I have another great example but I'll have to save it because it's a present and I don't want to give away the surprise.
Next quick project: bed warmers
![]() |
| (a stack of folded warmers after a fit of Christmas sewing) |
This one is easy and quick too. Buy some muslin, cut two pieces 7" x 14", sew together on three sides, turn rightside out and fill with 2 1/2 cups of rice, tuck your ends in and sew shut. Pick some cute flannel and cut one long peice 7.5" x 32", fold the ends down (wrong sides together) 1/4" and iron, fold over another 1" and sew. Fold whole piece in half (right sides together) and sew down each side, turn your pocket right side out, insert your warmer into it's washable comfy pocket, put in the microwave for 2-3min and stuff down at the bottom of your bed. Enjoy the cozy. Hurry quick before it gets warm!
Tuesday, March 6, 2012
Fat Tuesday's (one) original idea
Well I'm on the run today, (no, not from anything), a million things to do and only 24 hours to do them in. Hrm, tricky. So I'm just popping in to show you a quick something.
They're powder bags in case you were wondering. What is a powder bag you ask? It's my one lone original idea. Here in San Diego any day is can pretty much be a beach day if you want it bad enough. My trouble after I had kids was the whole question of how to not bring the whole beach home with us, and how to time the beach day so that I could arrive home in time to give the kids a bath before naps.
This is the answer to that. Someone told me that a little baby powder sprinkled on the hands and feet, (and arms and legs and everywhere else), and then dusted off again would take off beach sand and leave your little ones clean enough to skip the bath, at least for nap time that is. I tried it and they were right- it's magic, the sand falls right off. But why carry around a bottle of baby powder when you could have pretty fabric instead- and why dust all your children yourself when you could just hand them a powder bag and they could do it (willingly!) themselves as you pack up?
The interior pouch is filled with baby powder and sewn shut (yes, this means some day it will run out- I've had mine for two years and it's still fairly full- I'm not worried) to make a little pouch that you simply rub over your skin to remove the sand. The powder comes thru the fabric just enough to be useful without getting used up immediatly. The exterior pouch is vinyl and velcro to keep a perfect seal on the baby powder pouch and keep your car/diaper bag clean. Now how fun is that? I sell these for $10 apiece, (or $15 for custom fabric), plus shipping and I'd love to say that they are in my etsy shop and to go take a look- but alas, it's not true. I haven't posted any recently. If you are interested though I'd love to make you one- just write my a note in the comments with your email and we'll chat okay?
Spring is in the air folks- enjoy it!
They're powder bags in case you were wondering. What is a powder bag you ask? It's my one lone original idea. Here in San Diego any day is can pretty much be a beach day if you want it bad enough. My trouble after I had kids was the whole question of how to not bring the whole beach home with us, and how to time the beach day so that I could arrive home in time to give the kids a bath before naps.
This is the answer to that. Someone told me that a little baby powder sprinkled on the hands and feet, (and arms and legs and everywhere else), and then dusted off again would take off beach sand and leave your little ones clean enough to skip the bath, at least for nap time that is. I tried it and they were right- it's magic, the sand falls right off. But why carry around a bottle of baby powder when you could have pretty fabric instead- and why dust all your children yourself when you could just hand them a powder bag and they could do it (willingly!) themselves as you pack up?
The interior pouch is filled with baby powder and sewn shut (yes, this means some day it will run out- I've had mine for two years and it's still fairly full- I'm not worried) to make a little pouch that you simply rub over your skin to remove the sand. The powder comes thru the fabric just enough to be useful without getting used up immediatly. The exterior pouch is vinyl and velcro to keep a perfect seal on the baby powder pouch and keep your car/diaper bag clean. Now how fun is that? I sell these for $10 apiece, (or $15 for custom fabric), plus shipping and I'd love to say that they are in my etsy shop and to go take a look- but alas, it's not true. I haven't posted any recently. If you are interested though I'd love to make you one- just write my a note in the comments with your email and we'll chat okay?
Spring is in the air folks- enjoy it!
Sunday, March 4, 2012
Ahoy!
I'm taking a break from my quilts for a bit to tell you about my newest hobby: sailing.
...joking...
One of my favorite movies is What About Bob?. You HAVE to watch the "I'm Sailing" video clip. It's one minute long. Do it. You know you want to.
"Dr. Marvin! Guess what! Ahoy! I sail! I'm a sailor! Isn't this a breakthrough?! Out on a boat...on a lake...way far away from the dock...with the wind, and the wind, and, and the sky and everything?? AHOOOY!"""
No, really, I am taking a break from my quilts (just finished one last week!) (and I have two more to work on!) to sew a couple little ties onto some onesies. I had a friend special order a tie with a sailboat theme (hence my reference to What About Bob), as she's going to an 80th birthday party for someone in her family, and there is some sailing significance.
not sewing the little onesie to itself is difficult
corners are difficult
So my question is...when using a zig zag stitch, how do you make the corners identical? As I'm turning the shirt, sometimes it looks like I went over it twice (like the top left corner) and sometimes it looks like I completely skipped it (like the top right corner)! Any help on that one?
Maybe I can get a cute picture of the 2 boys in their shirts and post an update! I'll see what I can do for you, faithful readers...
Did you watch the video clip? :)
Thursday, March 1, 2012
Repairs
I love getting hand-me-downs! The thing I've noticed, however, is that as my daughter is getting older and clothes are worn for longer by each person they tend not to last as long. When I pulled out the bigger size jeans for my daughter they barely lasted a month before there were holes in the knees. So in a effort to make them last longer I decided to patch them, nothing new or unique about that, I know But it is the only sewing I did this week. I pulled out my scraps and some steam-a-seam and here is what I came up with.
My goal was to make them look cute as well as be functional. I wanted to use a dark fabric in order to hide dirt and stains but still be multi-colored in order to match most of the tops she has. I also attached a square of fabric to the inside to really prevent the tear for getting worse and hopefully make it a little more comfortable. I'm happy with how they turned out and she just thinks it's fun to have mom sew things on her clothes (let's hope that attitude lasts for a few more years) :)

Posing for the camera. Notice the mismatched socks... yeah she's dressing herself these days. I swear she has plenty that match.
See you next week!
Holly
Tuesday, February 28, 2012
Fat Tuesday's Vintage Skirt
My love affair with fat quarters is largely due to how inexpensive they can be; which of course naturally leads me to thrifted fabric. In the case of this skirt not only thrifted but thrifted by someone else and then given to me- i.e. free!
It began with Melody (Monday's girl) finding a darling top sheet at a thrift store and using it to back a quilt (one of my favorite quilts of hers, I'll have to make her share it with y'all). The next weekend found Holly (Thursday's girl) and I marching out of the same thrift store with three or four sheets each. The darling vintage flower print found it's way home with her, under my admiring eye, for a total of 0.95 cents. Where she proceeded to use it to make a purse that she sold at Oktoberfest and a few other little things before deciding that she was tired of working with the same fabric over and over and passed the rest of it on to me- why yes, thank you!
The pattern is a bit of a game of six steps to Kevin Bacon (did you ever play that? You try to connect everything to Kevin Bacon in six steps or less? It's weirdly uncanny how it works). About a year ago I was on a blog that I read frequently (can't remember which one), which led me to another blog, which led me to another blog, which had this darling tutorial for a forties inspired high waisted skirt. I skimmed over the tutorial and liked the skirt so much that I swear I favorited it, (this was way back in the days before pinterest), but I was never able to find it again. It was such a great skirt though that I cobbled together what I could remember of the tutorial and made up my skirt- except that this is not that skirt. This one was inspired by that one. There were a few improvements that I wanted to make to the original to make it faster to pull together and then several of the changes were due to not having quite enough yardage in my gifted half of a sheet.
Have I lost you yet? If you're still here I'll give you a quick rundown on how I made it. And please, please, please if you're interested in using this as a tutorial, feel free, but read thru the whole thing first to make sure you know everything before you cut out your pattern. You may need to adjust here and there to suit your needs (i.e. the length of skirt- I didn't need a hem so my skirt measurement is full length- if you cut that piece according to my measurments and then added a hem you'll be sporting a very full mini skirt and I don't want you to bring back the eighties on account of me).
Below is a quick sketch of the pattern pieces- not the actual pattern to scale so don't try and print it out, you'll be sorely disappointed, but an idea of the shape your pieces should be with measurements that fit my frame so that you can adjust as needed. In skirts I'm roughly a size two, just so you have a starting point for the measurements I'm giving you...
Still following me? You're brave, okay- so first turn on your iron and get that heating. Now haul out your serger (or flip to your zigzag stitch if your house is sans serger) and lets get those exposed edges taken care of. (note: when I give instructions for a piece that there are two of do the same to both pattern pieces).
Piece #1- serge (or zigzag) side "D", iron along the fold (right sides together of course) and serge sides "C" and "B" together. (You can sew it as well if you like or if you're using a zigzag stitch you'll need to, but the serger alone works fine for me). Turn them right side out and iron them flat. Nice, now you have your two ties.
Piece #2- Serge all four sides, turn all four sides under (just the width of your serged edge) and iron down to give a nice crisp line starting with the short sides. Now fold in half long ways (wrong sides together) and iron again as sharply as possible.
Piece #3- Hold it up to your hips and decide where you want your pockets. (A quick note on the pockets- make sure that the wrist edge is wide enough to get your whole hand thru easily- not that I found out the hard way or anything...). Pin your pockets (piece #4) in place (wrong side of pocket to wrong side of skirt) and and serge the wrist edge to the edge of your skirt. I didn't actually pin these, but you could, if you're into that sort of thing. Now serge (or zigzag and sew) your two skirt pieces together above and below your pocket opening to make one long skirt piece.
Whew, still with me? Let's keep going...
Piece #3- Grab a piece of 1" no-roll elastic and cut it to fit the top of your hips plus 1/2". Mine was 31.5 for reference. Fold the top edge of your fabric over 1.25" and iron down. Don't sew it down yet. A few notes on the hem. I used a sheet and I used the top (4" hem) of the sheet as the bottom of my skirt, which I think turned out nicely. If you happen to not use a sheet you'll need to add extra length (4.25") to piece #3 and add in a hem, now is the time to do that if you need to- go ahead, I'll wait..... Okay, done? Great. Now serge the two ends of your long skirt piece together above and below your other pocket (right sides together of course) to make a circle of skirt. Now you can go ahead and stitch that top fold on your skirt in place so that you have a channel for your elastic. Remember to start at the back of your skirt and not at a side hem and remember to leave about an inch and a half open to fish your elastic thru. Go ahead and fish your elastic thru and sew it together by overlapping it 3/4" and giving it several strong lines of stitching back and forth. Now sew your hole that you fished the elastic thru closed (this is also where you would put in a tag if you want to be all cute like that- I always want to and often forget). I like to catch my elastic here just a tiny bit so the bump of the elastic that was sewn together can't work it's way around to the front. Grab your pocket flaps and serge those right sides together so that you have pockets instead of flaps. Turn your skirt right side out. Set this aside and lets get the waist band going.
Pieces #1 & #2- Take one of you Piece #1's and sew it down to the folded (remember we folded in just a quarter inch and ironed it?) edge of either side "B" or side "D" of Piece #2. Do the same thing with your other Piece #1 to the opposite side of Piece #2.
Hang in there, we're almost done...
Now this next part is a bit tricky to explain without photos but I'll give it a whirl for you... take Piece #2 and stitch the wrong side of it to the inside of your skirt waist band with the rest of it above the band. You want Piece #2 to eventually fold over and for the ties to be on the outside of the skirt when it's folded over. Like Piece #2 is an upside down bun and the skirt is a hotdog but I only want you to sew the inside part right now and I want you to sew it very close to the elastic but be careful to not actually catch any of the elastic. And be sure to line this whole thing up so that the middle of Piece #2 is at the middle of the front of the skirt (Piece #3). Clear as mud? Good. (I should mention here that the waist band is not meant to go all the way around- there should be about 4" of exposed skirt in the back- this is both for ease of putting it on and for aesthetics).
Last part. Fold your waist band over, (being careful to keep your ironed 1/4" tucked under), and stitch it down to the front of your skirt, again being very careful to not catch your elastic. I stitched it down and then gave it another line of stitching 1/8" lower just to give it a bit of a more professional look. Done!!! Slip on your skirt, (the elastic should move freely and make it very easy to slip on), and either tie a big bow in the back or just give the ties one tie around each other in the back and do a cute little knot in the front.
There you have it folks- my one of a kind, so far from the "can't find it" tutorial of the inspiration skirt that I'm considering it an original design, fifty cent, thrifted vintage skirt. Like it? I do, especially with a bold pair of $5 blue Target tights. Happy Tuesday my lovely sewists. Hope I didn't make your ears bleed too badly with that one. Feel free to put questions in the comments and I'll do my best to help.
Labels:
clothes,
fat tuesday,
patterns,
re-purposed,
sewing,
skirt
Monday, February 27, 2012
unnamed quilt...finished.
Meet ______________.
I have yet to name her. She's a surprise gift for a friend, whose husband asked me to "make her a purple quilt....and grey.....king size...." We later nixed the king size for a throw size that she could still "throw" on to her "king size" bed if she wanted to.
My proudest accomplishment on this one: four awesome corners. I've never had all four corners look...well, like corners. I'm going to go ahead and pat myself on the back for this one!
I had a wonderful lady that I met at a quilting class last year do the quilting on her long-arm quilting machine, and she did it for a great price! It makes me want to get started on my next quilt! She has made a loyal customer out of me...look at those awesome flowers/leaves/squiggles... Love it.
Oh, and my handsome husband is already testing out its comfy rating before we give it to the recipient. Verdict: 8.5 out of 10. And that's pre-washing!
Here's the big picture of the quilt, where you can see the pattern. I used the Seville pattern by one of my favorite quilter/bloggers, Cluck Cluck Sew.
Any suggestions on names?
Thursday, February 23, 2012
Sneak Peek
So Monday was a holiday and I was given a few child free hours by my awesome husband to sew with no interruptions. I was getting tired of sewing the tumblers together for my scrap quilt so I pulled out my cut pieces for my king size bed quilt. I put on pandora to a little 90's/early 2000's mix and got to sewing. Also because is was a Monday sewing night I got a few more hours in the evening and to my delight I was able to finish my quilt top...in one day!
Here is a sneak peek, I don't want to show the finished product until I quilt it.
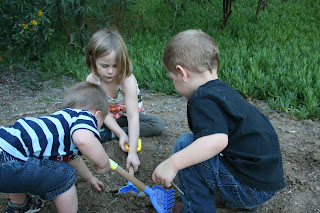
Besides that we have been enjoying the wonderful 80 degree San Diego weather this week and yesterday we decided it was a perfect day to dig in the dirt.
See you next week!!
Holly
Tuesday, February 21, 2012
The humble beginnings of Fat Tuesday
So, waaaay back two yearsish ago, our beloved nanny, Ledah, decided to go and graduate college and get married. I know right? Uncalled for- we miss her terribly, still. Her husband is lovely though and I suppose everyone has to grow up sometime... She told me about her engagement by way of asking if she could have the kids (just Squeaker and Odie, who were barely four and two at the time. Missy was just a large bump on me) in her wedding. Yes!! Yes, you may! Now what to wear? My first thought was tutu and when she called and said "well, I know it's unconventional, but what about something in the tutu sort of genre?" I knew I was going in the right direction. Except that we couldn't find anything in ivory- only white. Her dress was decidedly ivory with touches of a darker coffee with cream color- white just wouldn't do. So I opened my big mouth and offered to make it... What was I thinking? I didn't sew! My machine was given to me by my grandma (another story for another time) and was circa 1950's. Plus it had serious bobbin issues... Hmmm... Well I was committed, so I borrow my neighbors sewing machine and set off to find a base shirt to work with.
(the dress)
Baby Gap tank in the clearance section- score! I bought a lightly patterned quarter yard of ivory cotton to be the under skirt, a yard each of ivory and shimmery ivory tulle, and a quarter yard of white jersey knit for the sleeves.
(Odie 2, Squeaker just barely 4- both mine)
I started with the sleeves. All I could find was white jersey (this was way back before I knew where to look) but my mother in law had the great idea to tea dye them- which worked wonderfully and gave it a lovely vintagey look where the dye gathered at the edges of the fabric and made it darker, so cute. (I will warn you though that when I washed it-,(thankfully I had the good sense not to wash it before the wedding), the tea DID wash out and I was left with white ruffles like you see in the top photo; so beware). I cut three half moon shapes of varying sizes for each sleeve and gathered one edge and then just stitched them on in progressively smaller sizes one on top the other.
The under skirt when on fairly easy, I just gave it a quick gathering stitch and then basted it directly to the bottom of the shirt. Same thing for the tulle. I cut it into strips about eight inches wide and sixteen inches long and folded it over to make an offset square. Then I gave it a gathering stitch on the fold and sewed it to the skirt alternating shimmery tulle and matte every other one. This is where things got hairy. All was well but it was getting later and later and I guess I was getting tired because I ended up catching a bit of the shirt in the stitching I was doing for the skirt. Oh horrors- I picked it out as carefully as I could, (my MIL was in town and she helped- but I was using very tiny stitches and even with the patience of both of us...well), but it was no use- there were holes in the shirt and still a bit of shirt tucked up in the skirt that refused to yield to my seam ripper...sad. Off I went to Baby Gap with my fingers crossed and a prayer in my throat. Yes! They had one more on the rack in her size, hurray! Home again home again jiggity jig. I just snipped off the skirt whole and sewed it on the next shirt. Probably not the most professional method but it looked fine and I was not starting all over again...
(Mr Handsome and one of his three favorite girls)
Lastly I stitched on a few rolled flowers at the waist, some dyed, some not, and called it good. The bride LOVED it- which is all the matters- and Miss Odie looked precious all day long. Even when she sat down at the end of the isle and bawled and refused to go down it even with Squeakers encouragement and I had to carry her down and got to be in the wedding for several impromptu seconds huge belly and all- even then she looked adorable.
(gazing)
This last photo clearly has nothing to do with the dress, but aren't they the sweetest? I could just eat them with a spoon, to say nothing of that cake and our dearest Ledah's fantastic taste in flowers...
And that my friends, was my first "real" foray into sewing...
Subscribe to:
Posts (Atom)